Tools Module
Interface Areas
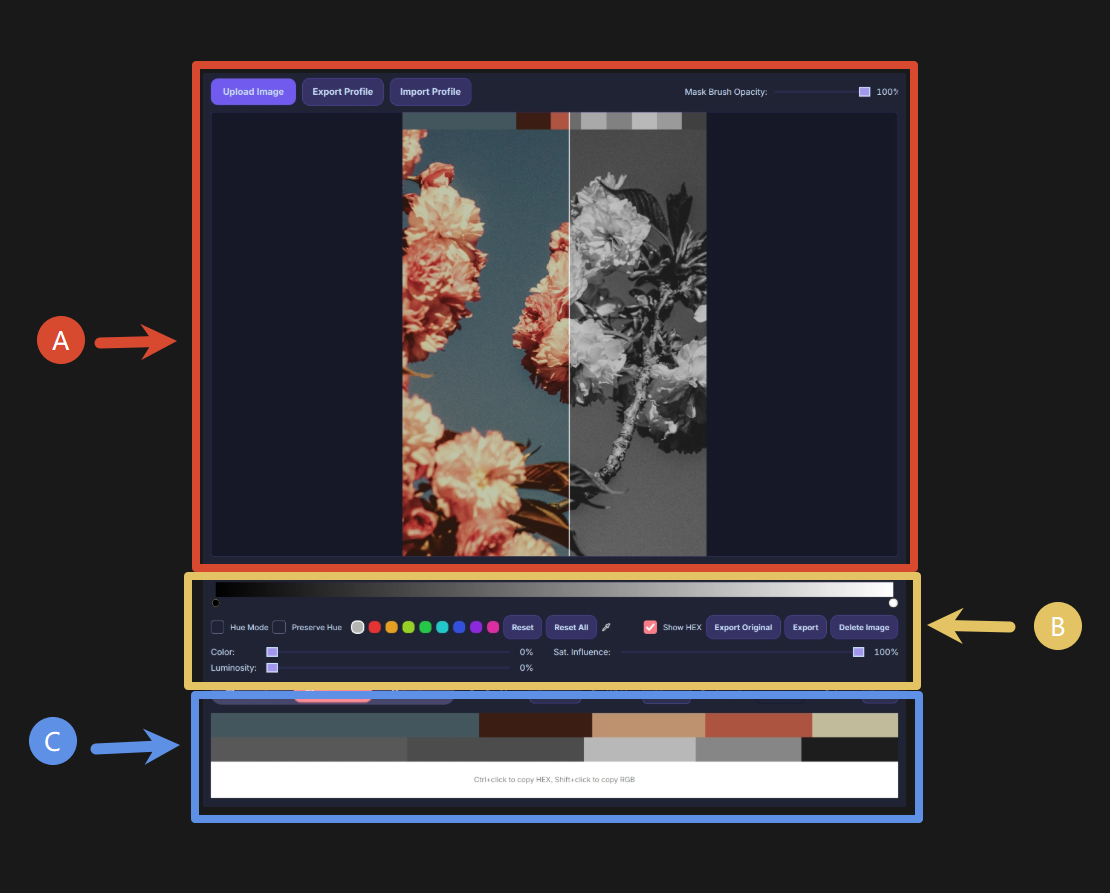
- A: Preview area.
- B: Adjustment area.
- C: Original image (top) / Result (bottom) color theme preview area.
Import Images
How to Import Images
- Click the upload button or click the image import area to select and import an image file.
- Drag and drop an image file into the import area.
- Ctrl+C to copy an image file, then Ctrl+V inside the application to paste and import. (Supports copying images from web pages and pasting into the application)
Supported Image Formats
Standard image formats: PNG, JPG, JPEG, GIF, BMP, TIFF, WEBP, ICO
Camera RAW formats (via LibRaw): CR2, CR3, NEF, NRW, ARW, SRF, ORF, RAF, RW2, PEF, DNG, RAW, SRW, X3F, 3FR, IIQ, RWL, KDC, DCR, ERF
Import/Export Profile
You can quickly apply satisfactory color adjustment parameters to a group of similar photos without having to repeat the adjustments.
Export Profile
Save the current image's color adjustment parameters as a preset. (Does not include mask information)
The exported profile file format is: json
Import Profile
Import a saved preset file and apply the preset parameters to the current image (importing a profile will overwrite all existing parameter adjustments on the current image).
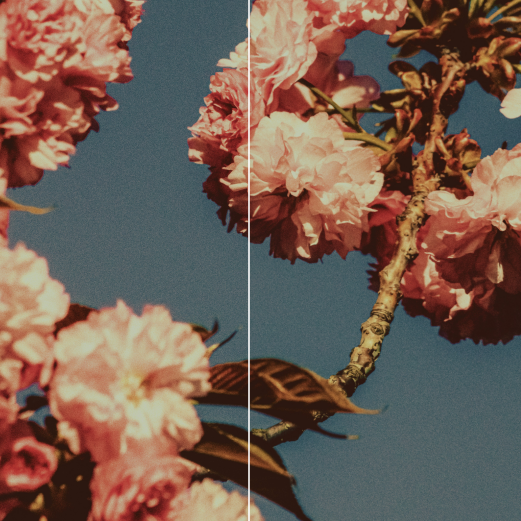
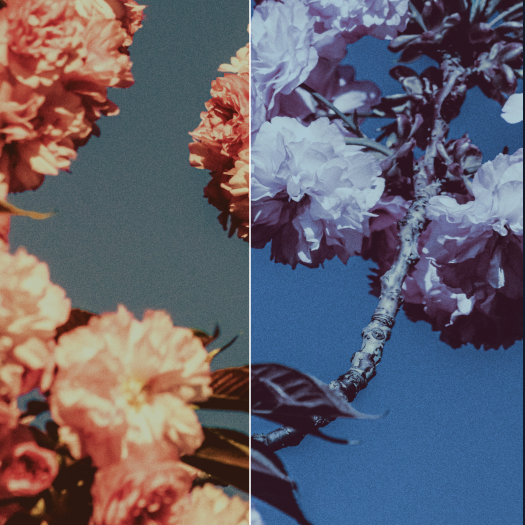
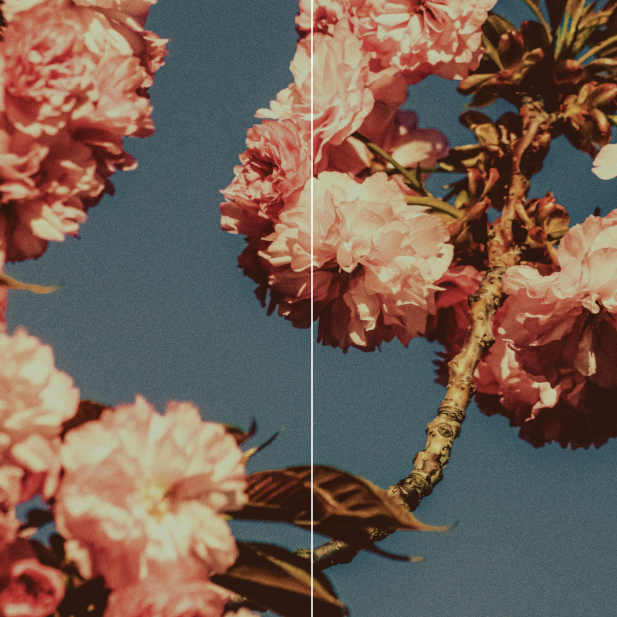
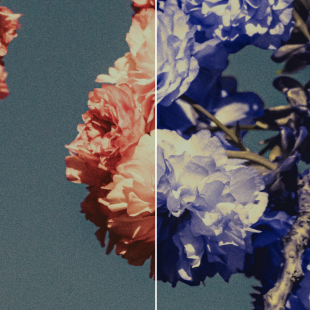
Original/Preview Split Line
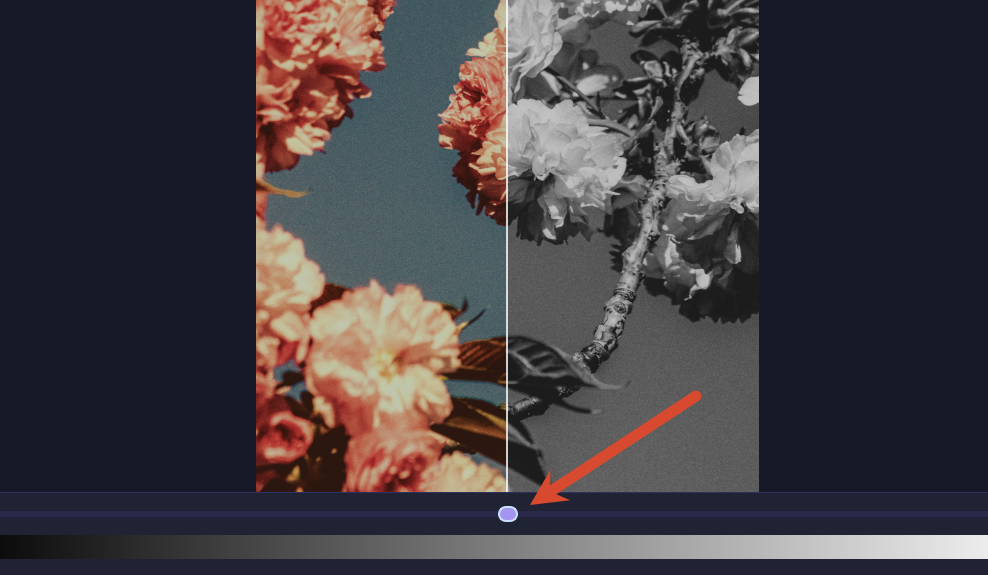
The left side of the split line shows the original image, and the right side shows a real-time preview of the adjustment result. The oval below is the slider that controls the split line position; drag it to adjust the split line position.
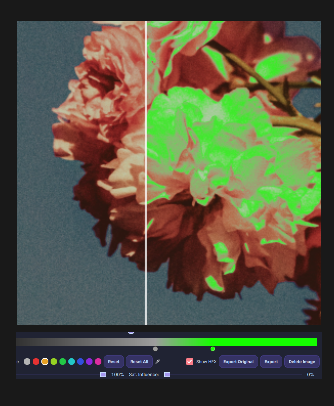
Mask
Each of the 9 channels has its own mask. Each channel's mask can be painted independently without affecting the others.
If you are not yet familiar with what a mask is, please refer to the mask description on Wikipedia: https://en.wikipedia.org/wiki/Mask_(computing)#Image_masks
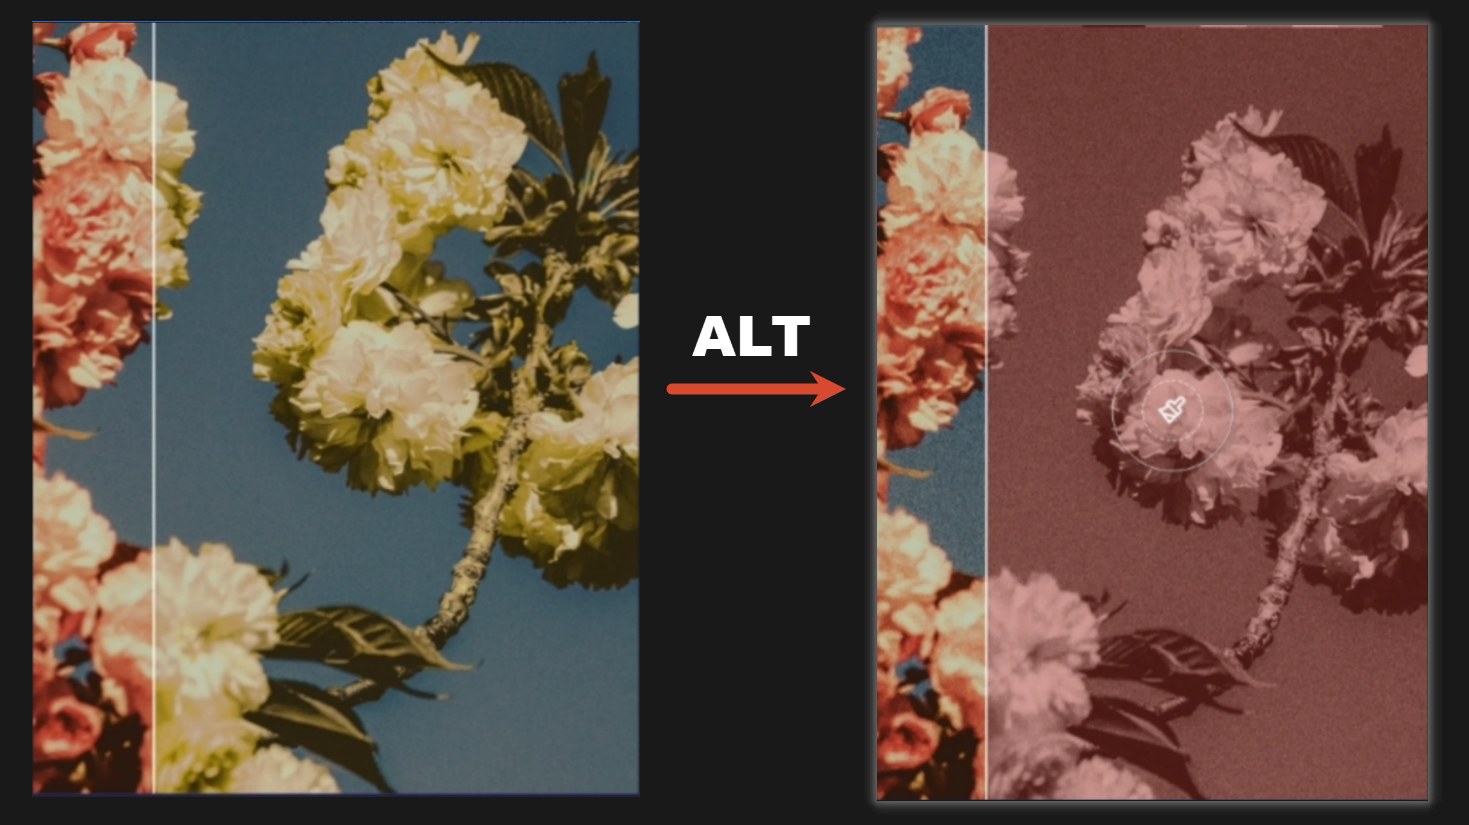
Mask Operations
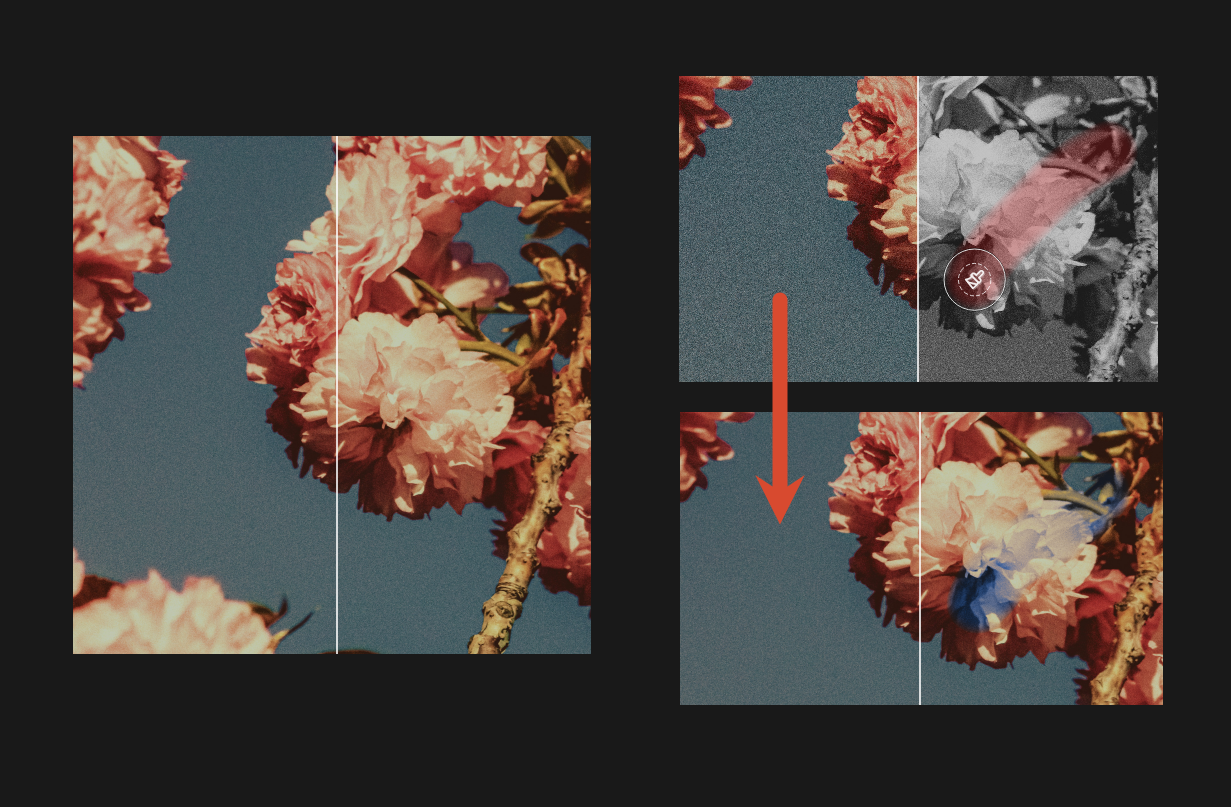
- Hold down the Alt key in the preview area to enter mask mode. The preview will turn black and white, and the mask will be displayed as a transparent red overlay. Red areas indicate where the color adjustment takes effect; non-red areas indicate where it does not.
-
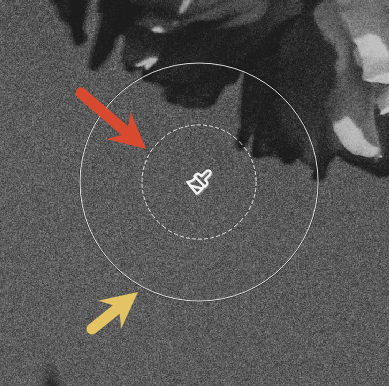
Brush Controls
- Resize Brush: Use the [ and ] keys on the keyboard to increase or decrease the brush size. The outer circle of the brush indicates the brush size.
-
Brush Hardness (Edge Feathering): Hold ALT and the middle mouse button while moving the mouse left/right to control the brush hardness. The smaller the inner dashed circle, the softer the brush; the larger it is, the harder the brush.
-
Paint Brush and Eraser Brush
-
Paint Brush: In mask mode, hold the left mouse button to paint. The painted area turns red, indicating that the parameter adjustments for the current channel take effect in that area.
-
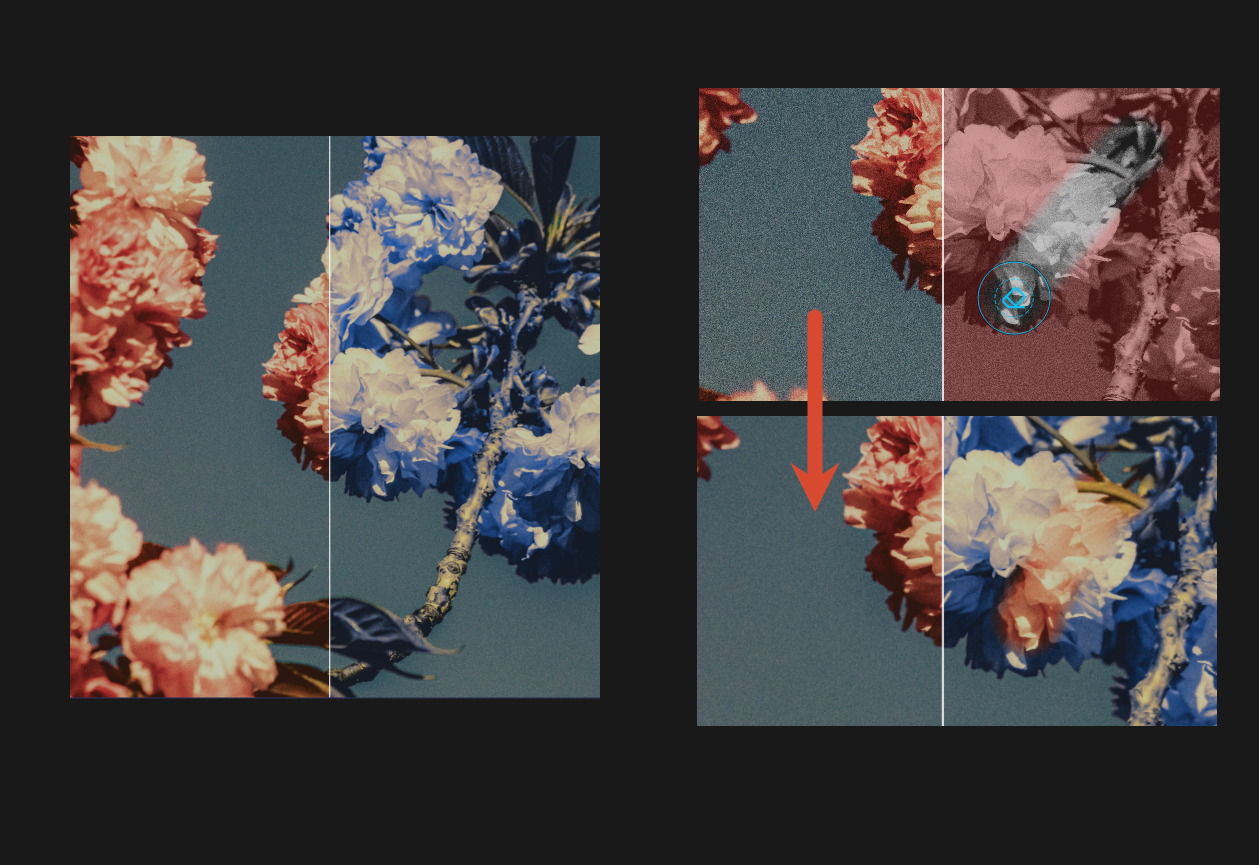
Eraser Brush: In mask mode, hold the right mouse button to paint. The red color in the painted area will be erased, indicating that the parameter adjustments for the current channel do not take effect in that area.
-
Mask Brush Opacity
Controls the opacity of the mask brush for both painting and erasing.
Opacity is stackable. Releasing the mouse button and painting again will add opacity on top of the previous stroke.
Opacity = 100%
Opacity = 50%
Color Grading
Global Channel
The Global Channel is used to adjust the final result. It is not affected by any parameters other than its own Color Strength, Luminosity Strength, Saturation Influence, and the gradient mapping bar.
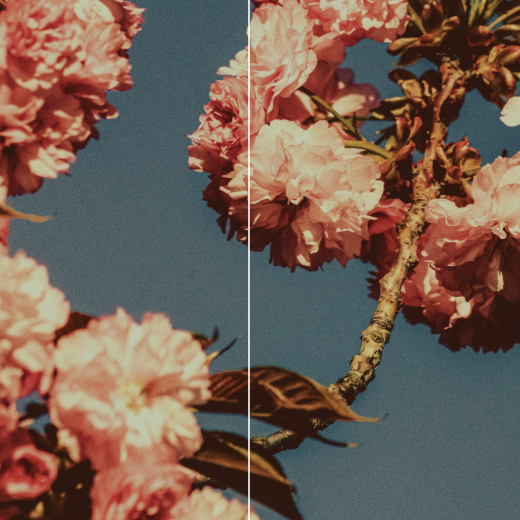
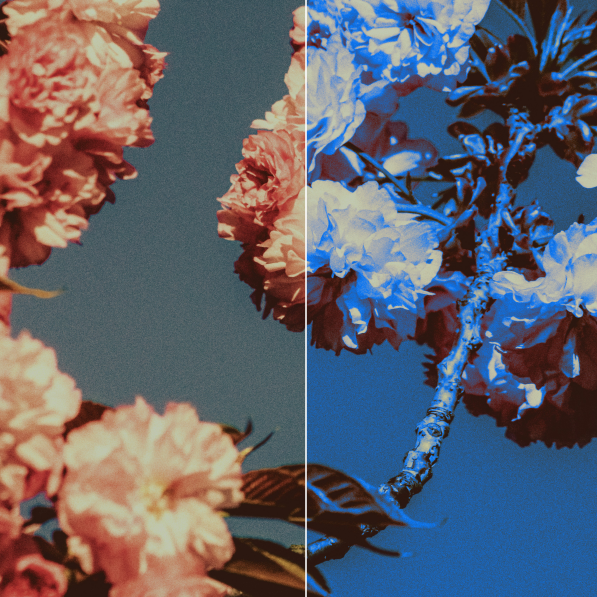
Color Strength: The degree to which the color effect adjusted in the Global Channel gradient mapping affects the final result (controls only the color effect, not the luminosity relationship).
Color Strength = 0%
Color Strength = 50%
Color Strength = 100%

Adjustment parameters in the above example (Luminosity Strength is 0% at this point)
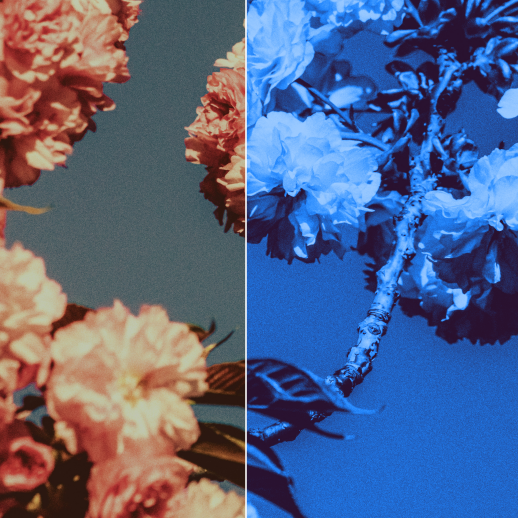
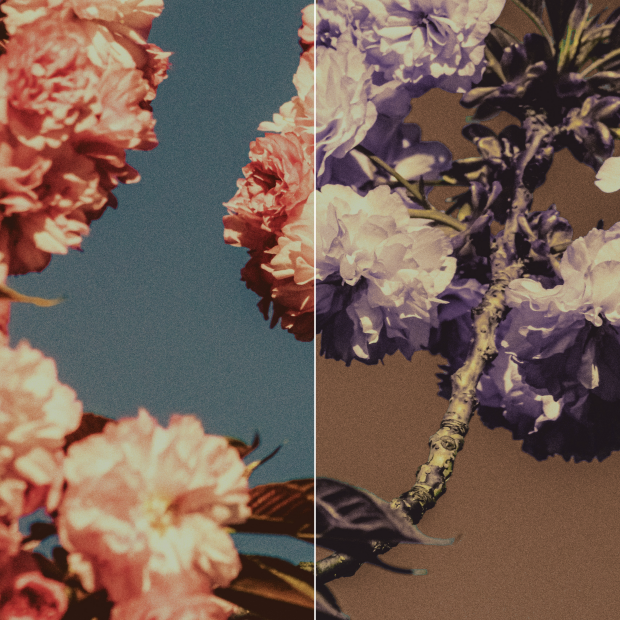
Luminosity Strength: The degree to which the luminosity effect adjusted in the Global Channel gradient mapping affects the final result (controls only the luminosity relationship, not the color effect).
Luminosity Strength = 0%
Luminosity Strength = 50%

Luminosity Strength = 100%
Adjustment parameters in the above example (Color Strength is 0% at this point)
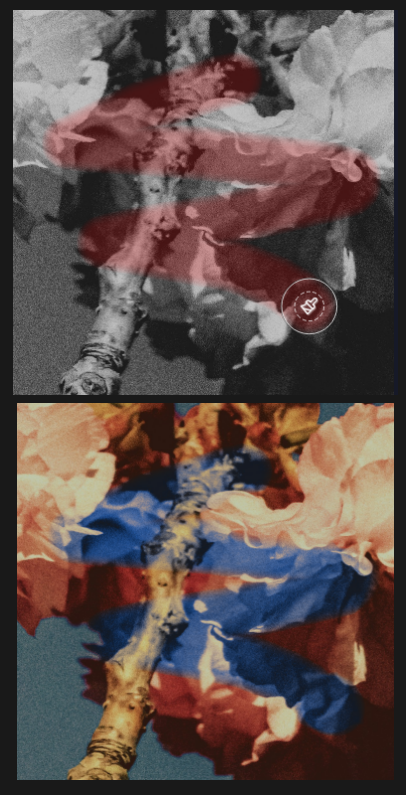
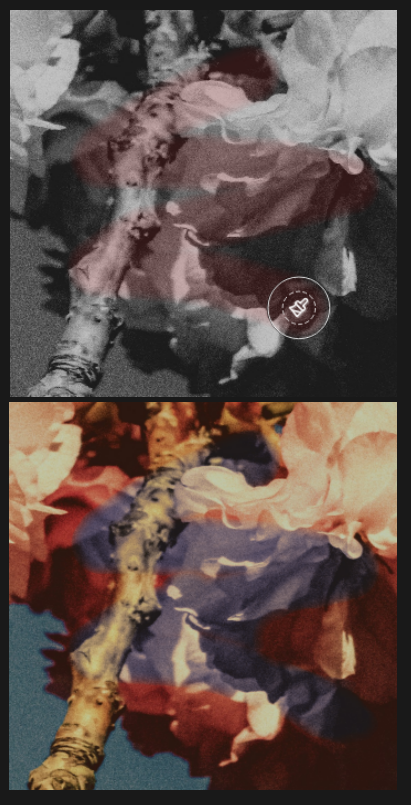
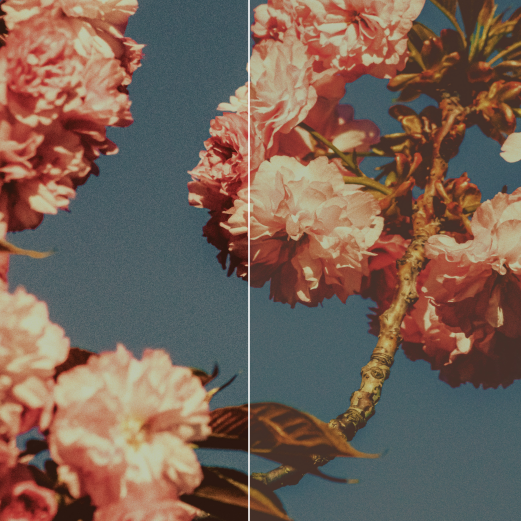
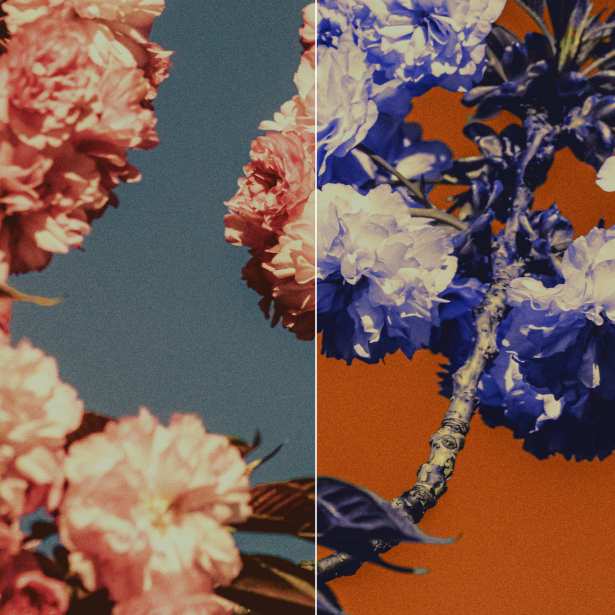
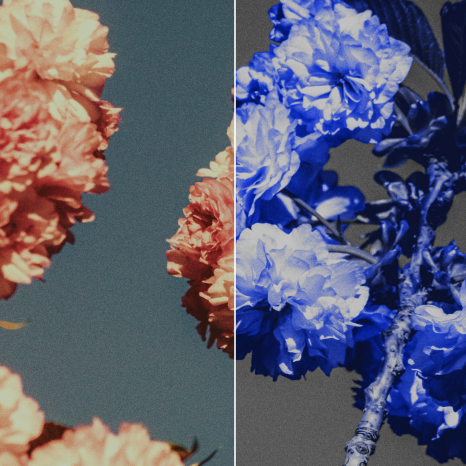
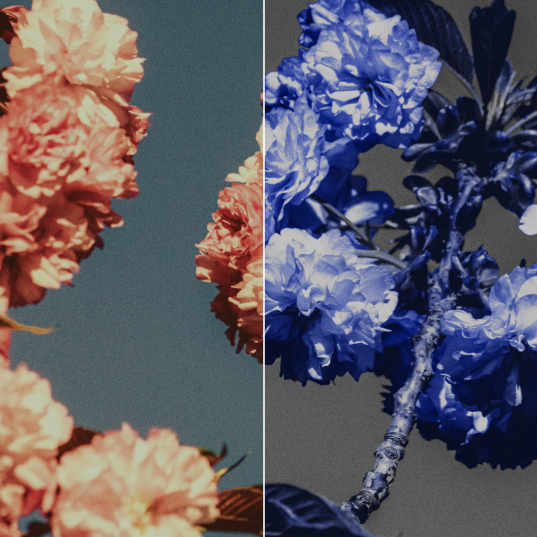
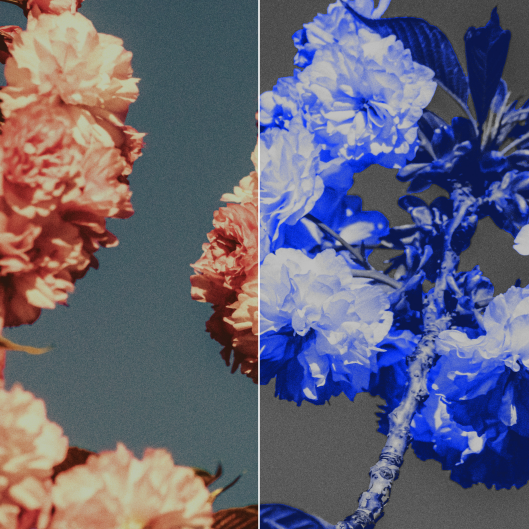
Saturation Influence: The effect is stronger on more saturated areas of the original image and weaker on less saturated areas. (Adjusting the percentage slider controls the strength of this "stronger saturation = stronger effect, lower saturation = weaker effect" relationship.)
Saturation Influence = 0%
Saturation Influence = 100%

Adjustment parameters in the above example (Color Strength is 100%, Luminosity Strength is 100% at this point)
In the above example, you can see that the dark and bright areas of the flower have lower saturation in the original image. So with Saturation Influence at 100%, the modification effect is weaker in low-saturation areas, meaning the red of the original image shows through.
8 Color Channels
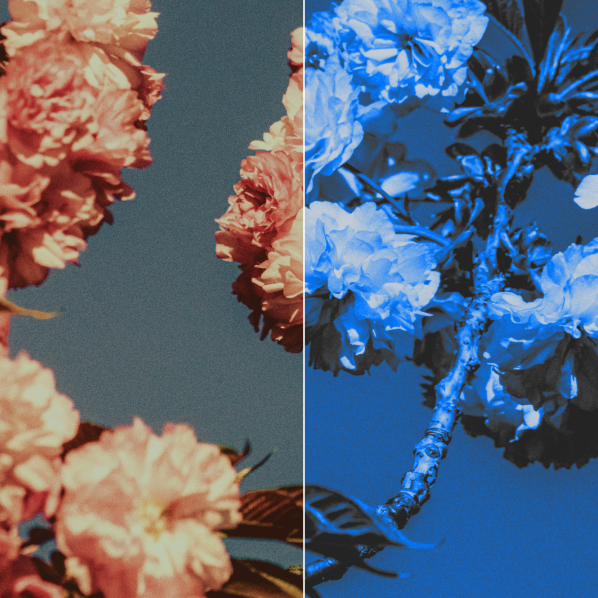
Blend Strength: Controls the overall opacity of the color adjustment. Higher blend strength makes the adjustment more visible; lower makes it less visible. At 0%, the color channel adjustment has no effect.
Blend Strength = 100%
Blend Strength = 50%
Blend Strength = 0%


Adjustment parameters in the above example.
Gradient Color Bar
Leftmost black node: Corresponds to the darkest area of the original image.
Adjusting only the black node, you can see color changes in the dark areas. Note that the red channel is being adjusted here because the hue of the flower's dark areas falls within the red hue range. Saturation Influence is set to 0% here because setting it to 100% would make the color modification very subtle in the dark areas due to their low saturation.
Rightmost white node: Corresponds to the brightest area of the original image.
Adjusting only the white node, you can see color changes in the brightest areas of the original image. Note that the orange-yellow channel is being adjusted here because the hue of the flower's bright areas falls within the orange-yellow hue range.
Adding nodes in the middle: Corresponds to the mid-tone areas of the original image, which is where most of the luminosity in the photo lies. You can choose to add nodes closer to the highlights or closer to the shadows.

Blue node in the middle.

Blue node near the white node.

Blue node near the black node.
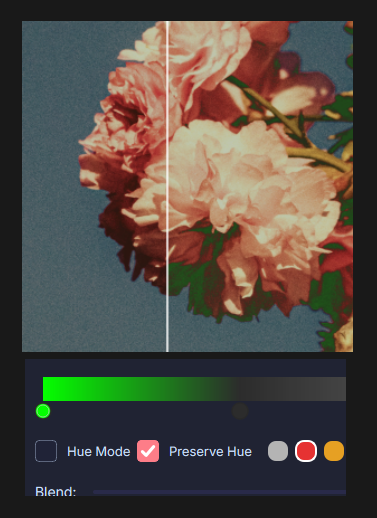
Hue Mode
Whether the adjustment result is blended with the original image using Hue Mode.
After adjusting colors, the luminosity at different positions in the result may differ from the original image. Enabling this option restores the original image's luminosity while preserving the color adjustments.
Preserve Hue
When unchecked, the result only shows the adjusted colors, and unadjusted colors appear as a black-and-white image. When checked, unadjusted areas will restore the original image's colors. The degree of restoration depends on the adjusted color strength in that area.

Preserve Hue = Unchecked
Preserve Hue = Checked
Other Operations
Reset
Reset the current channel's color adjustment to default (gradient mapping bar).
Reset All
Reset all channels' color adjustments to default (gradient mapping bar).
Eyedropper
Click the eyedropper, then sample a position on the original image to automatically select the channel with the closest hue.
Note that the automatically selected channel is only the closest match. If the color hue falls between two channel hues, it may be noticeably affected by both channels.
Export Original
Export using the unmodified original image as the main content.
Export
Export using the modified result as the main content.
Export Mode Slider
Image Only: Export only the image without a color bar.
With Image: The exported color theme image includes the original image.
Color Bar Only: Export only the color theme blocks, without the original image.

Export result with "With Image" selected.

Export result with "Color Bar Only" selected.
Color Bar Position
Which edge (top, bottom, left, or right) of the original image the color bar is placed on.
The color bar position can only be selected when the export mode slider is set to "With Image".
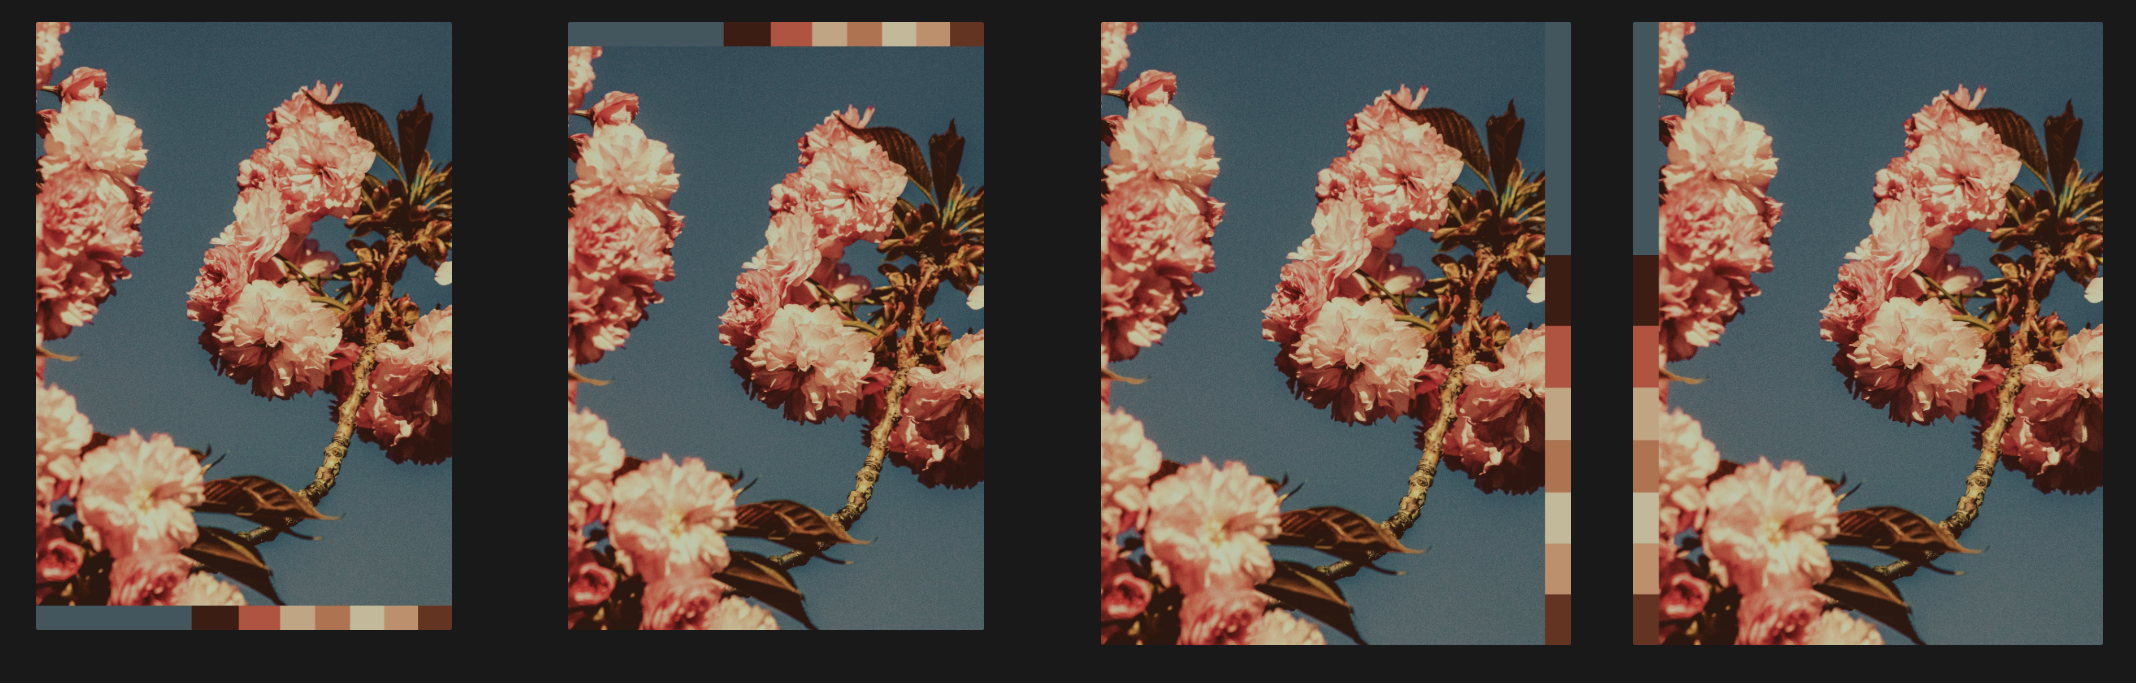
Effect when the color bar position is set to Bottom, Top, Right, and Left respectively.
Color Bar Width
The width of the exported color bar can be customized, with an input range of 10px to 200px.
Color Bar Length
The length of the exported color bar can be customized, with an input range of 400px to 4000px.
The color bar length can only be adjusted when the export mode slider is set to "Color Bar Only", since in "With Image" mode the length matches the edge of the original image.
With HEX
Whether to display the corresponding HEX value on each color block of the exported color bar.

With HEX enabled

With HEX disabled